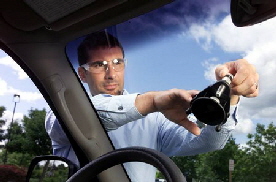
If you’re a Chula Vista resident, you’re no stranger to the sunny California weather and the occasional road debris that can result in annoying windshield damage. While professional auto glass repair shops in Chula Vista are readily available, sometimes a DIY approach can save you time and money. In this comprehensive guide, we’ll take an in-depth look at DIY windshield repair to help you maintain clear and safe driving.
Assess the Damage
Before embarking on your DIY windshield repair journey, you need to assess the damage thoroughly. Windshield cracks and chips come in various shapes and sizes. Some minor issues can be repaired at home, while others may require professional attention. To determine if your windshield is a candidate for DIY repair, it’s crucial to differentiate between a small chip and a more severe crack.
Small chips are typically less than 1 inch in diameter and can often be repaired with a DIY kit. Cracks, on the other hand, are longer and more complex. If a crack extends beyond 3 inches, it’s usually recommended to consult with a professional auto glass repair shop.
Gather the Necessary Tools
To effectively repair your windshield, you’ll need some essential tools and supplies:
- Windshield repair kit
- Safety gloves and goggles
- A clean, dust-free cloth
- Clear nail polish (for small chip repairs)
- A syringe for resin injection (usually included in the repair kit)
- Razor blade or a similar tool for excess resin removal
- A heat source (e.g., a heat gun or the sun)
- Having the right tools is the first step to ensuring a successful DIY windshield repair.
Follow the Repair Kit Instructions
Each windshield repair kit comes with detailed instructions that you should follow carefully. Typically, the process involves the following steps:
Step 1: Cleaning the Damage
Start by thoroughly cleaning the damaged area using a clean cloth and a glass cleaner. Ensure that the area is free of dirt, dust, and debris.
Step 2: Preparing the Resin Injector
Assemble the resin injector as per the kit instructions. Attach it to the damaged area securely, ensuring an airtight seal.
Step 3: Injecting the Resin
Carefully inject the resin into the damaged area using the provided syringe. The resin will fill the cracks or chips and restore structural integrity.
Step 4: Curing the Resin
Use a UV light (often included in the kit) to cure the resin. Follow the recommended curing time, typically a few minutes under direct sunlight or the UV lamp.
Step 5: Scraping Off Excess Resin
After curing, use a razor blade or a similar tool to scrape off any excess resin. Ensure the surface is level and smooth.
Polishing the Area
Apply a small amount of glass polish or cleaner and gently polish the repaired area to improve clarity.
Be Patient and Precise
Repairing your windshield requires patience and precision. Take your time to ensure that the resin is properly applied and that no air bubbles remain. For smaller chips, using clear nail polish can help fill the void before applying the resin. Remember, the goal is to prevent the damage from spreading further.
Test Your Repair
After completing the repair, it’s essential to test its effectiveness. You can do this by running your finger over the repaired area. If you can still feel the chip or crack, you may need to repeat the process or consider professional help.
Additional Tips for a Successful DIY Repair
Here are some additional tips to increase the chances of a successful DIY windshield repair:
Work in Optimal Conditions: Choose a well-lit, dry, and temperate location to conduct the repair. This will help with proper resin curing.
Repair as Soon as Possible: Address windshield damage promptly. The longer you wait, the more dirt and moisture can penetrate the crack or chip, making it harder to repair.
Protect Your Eyes: Wear safety goggles during the repair process to shield your eyes from any potential debris or resin splashes.
Avoid Extreme Temperatures: Extreme cold or hot weather can affect the resin’s curing process. Try to perform the repair in moderate weather conditions.
Practice on a Small Surface First: If you’re new to DIY windshield repair, consider practicing on a small, inconspicuous surface first to gain confidence.
Seek Professional Help When in Doubt: If you’re unsure about the extent of the damage or if the repair is unsuccessful, don’t hesitate to consult a professional auto glass repair shop.
Know When to Seek Professional Help
While DIY repairs can be effective for small chips and minor cracks, some windshield damage is beyond the scope of at-home fixes. If the damage impairs your visibility, is in your line of sight, or extends beyond a certain size, it’s best to consult an auto glass repair shop in Chula Vista. They have the expertise and equipment to handle more extensive repairs or, if necessary, replace the windshield.In Chula Vista, residents are fortunate to have access to reputable auto glass repair shops. If your DIY repair doesn’t yield the desired results, contact a local shop for a professional assessment and solution.
Conclusion
By following these comprehensive DIY windshield repair tips, Chula Vista residents can address minor windshield damage and prolong the life of their auto glass. Remember that while DIY fixes are suitable for small issues, larger or more complex damage may require professional assistance. In such cases, don’t hesitate to reach out to a trusted auto glass repair shop in Chula Vista for quality service and peace of mind.


