Introduction
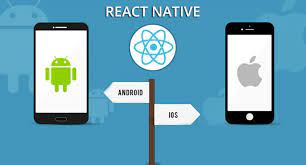
In the fast-paced world of mobile app development, creating apps that work seamlessly on both iOS and Android platforms is a priority for many developers and businesses. Cross-platform development offers significant advantages in terms of cost efficiency and time savings. One of the most popular tools for achieving this is React Native. In this blog post, we’ll take you through the process of building a cross-platform mobile app with React Native.
Understanding React Native
React Native is an open-source framework developed by Facebook that allows developers to build mobile applications using JavaScript and React. It’s not a “write once, run anywhere” solution like some other cross-platform tools; instead, it focuses on “learn once, write anywhere.” This means you can use your existing web development skills to create mobile apps that feel and perform like native applications.
Prerequisites
Before diving into React Native app development, make sure you have the following prerequisites in place:
- Node.js and npm: Install Node.js, which includes npm (Node Package Manager), as React Native relies heavily on Node.js for package management.
- React Native CLI: Install the React Native command-line interface globally using npm by running
npm install -g react-native-cli. - Android Studio or Xcode: Depending on whether you want to develop for Android or iOS, you’ll need Android Studio for Android development and Xcode for iOS.
Setting Up a New React Native Project
Let’s start by creating a new React Native project:
react-native init YourAppName

cd YourAppName
This will set up a basic React Native project structure with the necessary files and dependencies.
Writing Your First React Native Component
React Native uses components to build user interfaces, just like React for the web. You can create a new component by editing the App.js file in your project directory. Here’s a simple example:
import React from 'react';
import { View, Text, StyleSheet } from 'react-native';
const App = () => {
return (
<View style={styles.container}> <Text>Hello, React Native!</Text> </View> );
};
const styles = StyleSheet.create({
container: {
flex: 1, justifyContent: 'center', alignItems: 'center',
},
});
export default App;
This code creates a basic app with a single component that displays “Hello, React Native!” in the center of the screen.
Running Your App
To see your app in action, you’ll need to run it on an emulator or a physical device. Here’s how you can do it for iOS and Android:
iOS:
react-native run-ios
Android:
react-native run-android
React Native will build your app and run it on the selected platform. You can use the hot-reloading feature to see your changes instantly as you code.
Adding Functionality
Building the UI is just the beginning. React Native provides numerous libraries and packages to add functionality to your app. You can use packages like react-navigation for navigation, axios for making HTTP requests, and redux for state management.
Testing and Debugging
React Native has excellent debugging tools. You can use the built-in debugger or tools like Reactotron to inspect and debug your app during development.
Conclusion
In conclusion, React Native emerges as a powerful solution for building cross-platform mobile apps, including those tailored specifically for Android. With its foundation in React and JavaScript, you can harness the full potential of React Native to craft robust and feature-rich mobile applications, catering to both iOS and Android platforms. By embarking on your development journey with a straightforward project, experimenting with various components and libraries, and continually enhancing your skills, you’ll find yourself well-equipped to create impressive cross-platform mobile apps, leveraging the capabilities of React Native for Android.


